今回はJupyter notebookの拡張機能(jupyter_contrib_nbextensions)をインストールしおすすめの機能をまとめておこうと思います。
The IPython-contrib repository is maintained independently by a group of users and developers and not officially related to the IPython development team.引用: https://github.com/ipython-contrib/jupyter_contrib_nbextensions
jupyter_contrib_nbextensionsは公式とは関係なく個別にメンテナンスされているようですが、jupyter notebookを使う上で便利な拡張機能がたくさん提供されています。
利用用途によって必要な拡張機能は変わってくるかと思いますが、私が分析をする上で有効化している拡張機能をまとめておきたいと思います。
Jupyterlabだと既に似ている機能もデフォルトで使えますが、notebookのインターフェースに慣れてしまっているので少し面倒でもnotebook + jupyter_contrib_nbextensionsを使い続けてしまいます 笑
ちなみにJupyterlabではjupyter_contrib_nbextensionsは動作しません。代わりにjupyterlab-contribという非公式パッケージがあるようです。
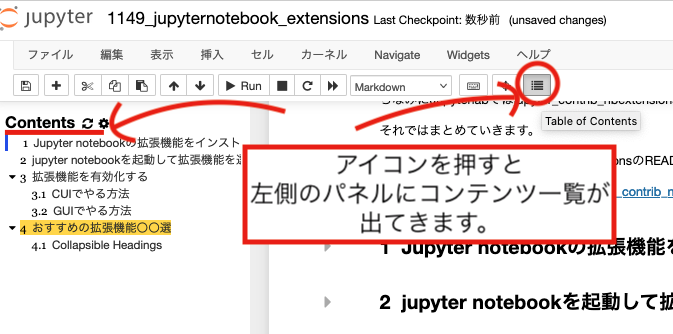
それではまとめていきます。
基本的には下記jupyter_contrib_nbextensionsのREADMEの内容に沿ってやっていきます。
Jupyter notebookの拡張機能をインストール&有効化する
# ライブラリのインストール
pip install jupyter_contrib_nbextensions
Collecting jupyter_contrib_nbextensions
  Downloading jupyter_contrib_nbextensions-0.5.1-py2.py3-none-any.whl (20.9 MB)
     ━━━━━━━━━━━━━━━━━━━━━━━━━━━━━━━━━━━━━━━━ 20.9/20.9 MB 14.6 MB/s eta 0:00:00
・・・省略・・・
Successfully installed jupyter-contrib-core-0.4.0 jupyter-highlight-selected-word-0.2.0 jupyter-latex-envs-1.4.6 jupyter-nbextensions-configurator-0.5.0 jupyter_contrib_nbextensions-0.5.1 lxml-4.9.1 pyyaml-6.0
# javascriptとcssをインストール
jupyter contrib nbextension install --user
[I 06:21:41 InstallContribNbextensionsApp] jupyter contrib nbextension install --user
[I 06:21:41 InstallContribNbextensionsApp] Installing jupyter_contrib_nbextensions nbextension files to jupyter data directory
[I 06:21:41 InstallContribNbextensionsApp] Installing /Users/hinomaruc/Desktop/blog/my-venv/lib/python3.8/site-packages/jupyter_contrib_nbextensions/nbextensions/rubberband -> rubberband
[I 06:21:41 InstallContribNbextensionsApp] Making directory: /Users/hinomaruc/Library/Jupyter/nbextensions/rubberband/
[I 06:21:41 InstallContribNbextensionsApp] Copying: /Users/hinomaruc/Desktop/blog/my-venv/lib/python3.8/site-packages/jupyter_contrib_nbextensions/nbextensions/rubberband/icon.png -> /Users/hinomaruc/Library/Jupyter/nbextensions/rubberband/icon.png
・・・省略・・・
[I 06:21:42 InstallContribNbextensionsApp] Copying: /Users/hinomaruc/Desktop/blog/my-venv/lib/python3.8/site-packages/latex_envs/static/doc/latex_env_doc_files/latex_env_doc_46_0.png -> /Users/hinomaruc/Library/Jupyter/nbextensions/latex_envs/doc/latex_env_doc_files/latex_env_doc_46_0.png
[I 06:21:42 InstallContribNbextensionsApp] - Validating: OK
[I 06:21:42 InstallContribNbextensionsApp] Installing jupyter_contrib_nbextensions items to config in /Users/hinomaruc/.jupyter
Enabling: jupyter_nbextensions_configurator
- Writing config: /Users/hinomaruc/.jupyter
    - Validating...
      jupyter_nbextensions_configurator 0.4.1 OK
Enabling notebook nbextension nbextensions_configurator/config_menu/main...
Enabling tree nbextension nbextensions_configurator/tree_tab/main...
[I 06:21:42 InstallContribNbextensionsApp] Enabling notebook extension contrib_nbextensions_help_item/main...
[I 06:21:42 InstallContribNbextensionsApp]       - Validating: OK
[I 06:21:42 InstallContribNbextensionsApp] - Editing config: /Users/hinomaruc/.jupyter/jupyter_nbconvert_config.json
[I 06:21:42 InstallContribNbextensionsApp] --  Configuring nbconvert template path
[I 06:21:42 InstallContribNbextensionsApp] --  Configuring nbconvert preprocessors
[I 06:21:42 InstallContribNbextensionsApp] - Writing config: /Users/hinomaruc/.jupyter/jupyter_nbconvert_config.json
[I 06:21:42 InstallContribNbextensionsApp] --  Writing updated config file /Users/hinomaruc/.jupyter/jupyter_nbconvert_config.json
オプションで設定ファイル(jupyter_nbconvert_config.jsonとupyter_notebook_config.json)のインストール場所を選択できるようです。
・--userだユーザーディレクトリ以下のjupyterディレクトリにインストール
・--systemだとシステムディレクトリ以下のjupyterディレクトリにインストール
という風になるようです。
Macbookの場合--userオプションだと/Users/hinomaruc/.jupyter以下にダウンロードされました。
--systemは試していないですが/etc/jupyterや仮想環境の/etc/jupyterフォルダにインストールされるかと思います。
jupyterのconfigのパスは下記コマンドで確認できました。
jupyter --paths
config:
    /Users/hinomaruc/.jupyter
    /Users/hinomaruc/Desktop/blog/my-venv/etc/jupyter
    /usr/local/etc/jupyter
    /etc/jupyter
jupyter notebookを起動して拡張機能を選択できるようになっているか確認
#jupyter notebookを起動
jupyter notebook
図: jupyter notebookの起動画面
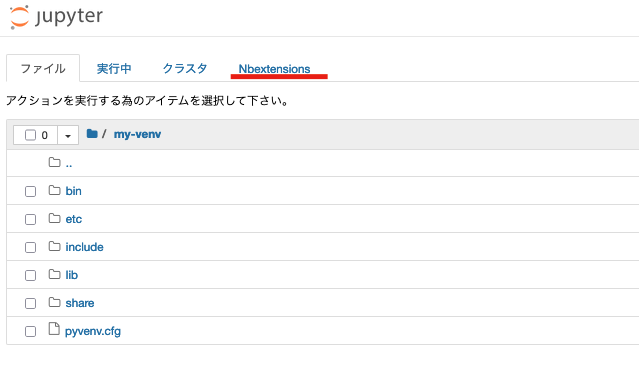
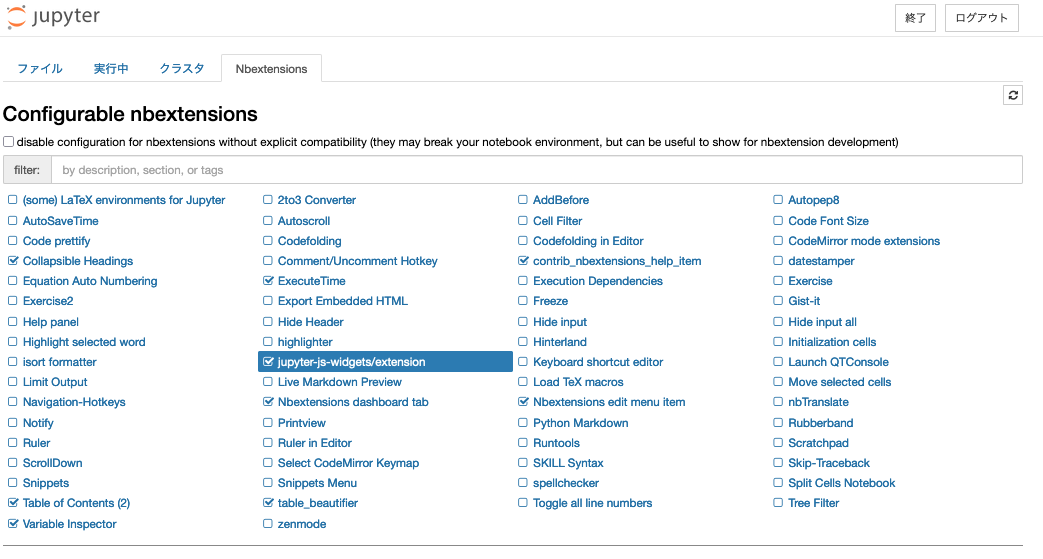
「Nbextensions」というタブが追加されていれば成功です。
図: Nbextensionsタブをクリック
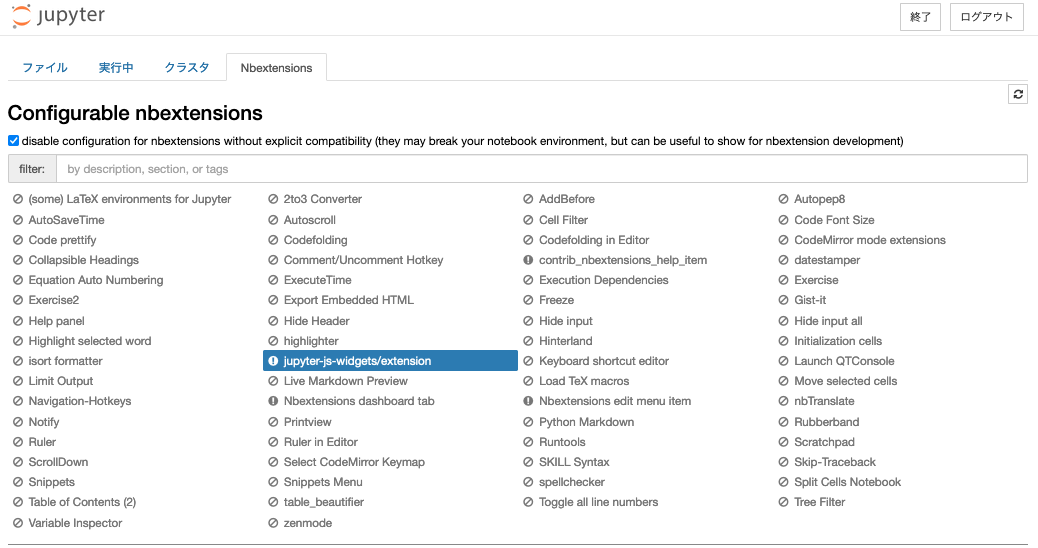
どうやら初期表示では互換性がない拡張機能はグレーアウトするようになっているようです。ほとんどの拡張機能はNotebook5系のバージョンまでの対応になっていて、22年8月現在の最新版はNotebook6系なので、全部グレーアウトしてしまっています。
図: disable configuration for nbextensions without explicit compatibility チェックボックスを外した

チェックボックスを外すと有効・無効をGUIで選択できるようになります。
デフォルトだと下記の拡張機能がONになっているようです。
・jupyter-js-widgets/extension
・Nbextensions dashboard tab
・contrib_nbextensions_help_item
・Nbextensions edit menu item
全て拡張機能そのものを使えるようにする機能関連ですかね。
拡張機能を有効化する
今のままだと拡張機能が使える状態になっているだけで、使いたい拡張機能を有効化してあげる必要があります。
どんな拡張機能があるかはこちらから確認できます。
有効化するのにはCUIでやる方法とGUIでやる方法があります。好みがあるかと思いますが、個人的には自動化する必要がない限り簡単なのでGUIでやることをおすすめします。
CUIでやる方法
# 使いたい拡張機能をONにする
jupyter nbextension enable [拡張機能の必須パス(required path)]
Enabling notebook extension [拡張機能の必須パス(required path)]...
      - Validating: OK
[拡張機能の必須パス(required path)]は「拡張機能の格納フォルダ名」+ "/" +「jupyter_nbextensions_configuratorで設定されているメインのjavascript名(拡張子除く)」のようです。
拡張機能の格納フォルダは私の仮想環境だと下記フォルダにありました。
ls /Users/hinomaruc/Desktop/blog/my-venv/lib/python3.8/site-packages/jupyter_contrib_nbextensions/nbextensions# 拡張機能のフォルダがある addbefore ・・・省略・・・ zenmode
jupyter_nbextensions_configuratorで設定されているメインのjavascript名(拡張子除く)はyamlファイルのMainという項目で設定されているようです。
例: highlighter機能
# highlighterフォルダを確認
cd /Users/hinomaruc/Desktop/blog/my-venv/lib/python3.8/site-packages/jupyter_contrib_nbextensions/nbextensions/highlighter
lsdemo_highlighter.html export_highlights.pdf highlighter.yaml tst_highlights.html demo_highlighter.ipynb export_highlights.tex icon.png tst_highlights.ipynb export_highlights.html highlighter.css image.gif tst_highlights.pdf export_highlights.ipynb highlighter.js readme.md tst_highlights.tex
# yamlの中身でMainに指定されているjsファイルを確認
cat highlighter.yaml| grep MainMain: highlighter.js
hightlighter機能をCUIでインストールする場合は jupyter nbextension enable highlighter/highlighter とすれば良さそうです。
jupyter nbextension enable highlighter/highlighter
Enabling notebook extension highlighter/highlighter...
      - Validating: OK
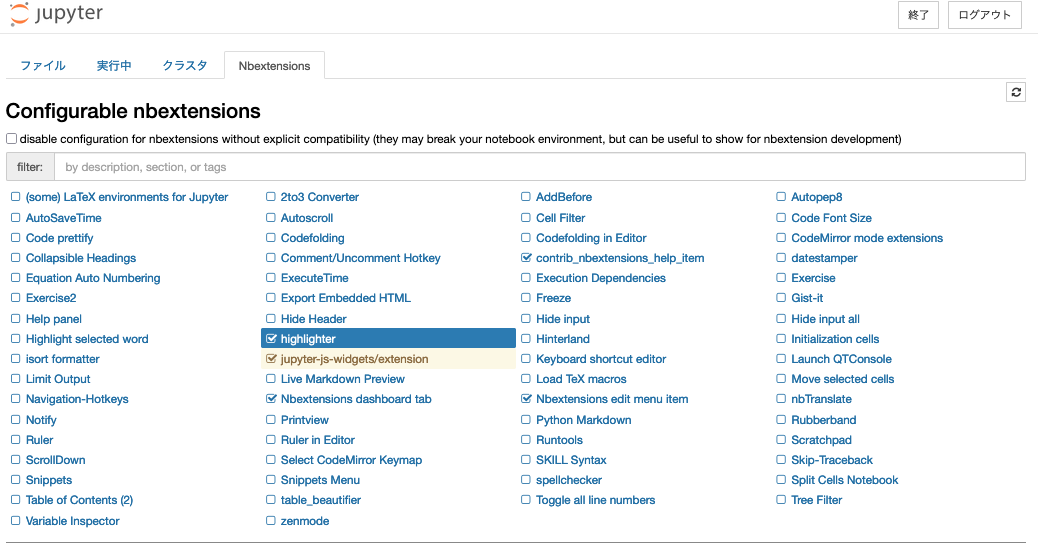
GUIでやる方法
簡単です。http://localhost:8888/tree#nbextensions_configurator にアクセスし、有効化したい拡張機能のチェックボックスをONにするだけです。
下記はhightlighter機能を有効化した例になります。
おすすめの拡張機能5選
Collapsible Headings
Allows notebook to have collapsible sections, separated by headings
require path: collapsible_headings/main
Collapsible Headingsはnotebookのmarkdownで#や##ごとにセクションを分割した単位でまとめてくれる拡張機能です。
特定単位ごとにまとめることができるので、最初の定形文を記載したセルや記載が終わった処理などは「##最初の処理」や「##データ読み込みパート」などを作成して畳んでおけば見やすいnotebookになるかと思います。
図:Collapsible Headingsの使用例
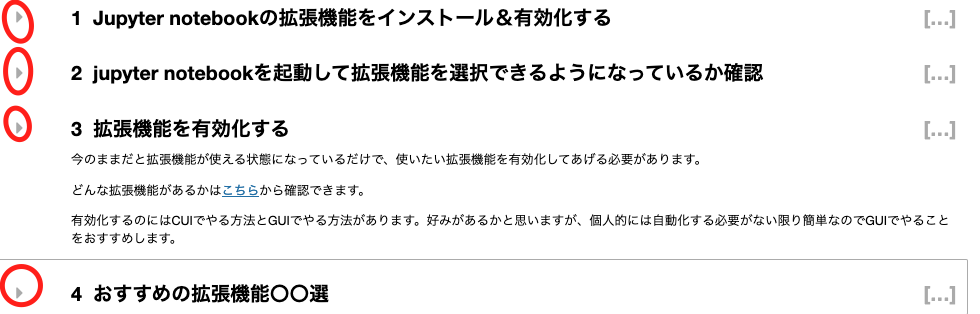
Table of Contents (2)
The toc2 extension enables to collect all running headers and display them in a floating window
require path: toc2/main
Table of Contents (2)は実行済みのmarkdownヘッダーを一覧表示してくれる機能です。
今自分がどこの処理を書いているのかなどわからなくなった時や前の処理(例えば関数パート)を振り返るときに便利です。
図: Table of Contents (2)の使用例
Variable Inspector
collects all defined variables and display them in a floating window
require path: varInspector/main
Variable Inspectorは定義済みの変数を見える化してくれます。いま変数Xには何が定義されているのかわからなくなった時に使ったり、デバッグする時にも必須になる機能です。
# 確認用に3つの変数 df,df2,testを用意
import pandas as pd
df = pd.read_csv("http://lib.stat.cmu.edu/datasets/boston_corrected.txt",skiprows=9,sep="\t",encoding='Windows-1252')
df2 = df.head()
test = [0,1,2,3,4,5]
図: Variable Inspectorの使用例

ExecuteTime
Display when each cell has been executed and how long it took
require path: execute_time/ExecuteTime
ExecuteTimeは地味に一番必要な機能になります。処理の実行時間と完了までにかかった時間をセルの下部に表示してくれるようになります。
実行時間は複数のnotebookでどちらのnotebookが新しいか確認するのに使えますし、完了時間もどの処理が時間がかかっていたか簡単に確認できるようになります。
図: ExecuteTimeの使用例

table_beautifier
Add bootstrap styling to tables in markdown cells and in html/md output
require path: table_beautifier/main
table_beautifierはアウトプットのテーブルをブートストラップ形式で表示してくれるようになる機能です。
ブートストラップ形式がどのようなものかわからなかったのですが、機能をONにしてみるとヘッダー部分が選択可能になっていて行の順番を昇順・降順に並べ替えることが出来るようになっていました。
pandasのデータだとsort_valuesなどのメソッドで並べ替えないといけないのがインタラクティブにできるようになるので、作業スピードはあがりそうです。
table_beautifierの使用例
# データの読み込みと表示
import pandas as pd
import numpy as np
df = pd.read_csv("http://lib.stat.cmu.edu/datasets/boston_corrected.txt",skiprows=9,sep="\t",encoding='Windows-1252')
from IPython.display import HTML
HTML(df.head().to_html())
まとめ
jupyter notebookの拡張機能のおすすめを5つまとめてみました。
まだnotebookをメインで使っている方はぜ参考にしてみてください。
最終的には下記のようにチェックボックスを選択状態にしています。
そろそろjupyterlabにも慣れないといけないかなと思っている今日この頃です。
バージョン
notebook : 6.4.12